

Introduction
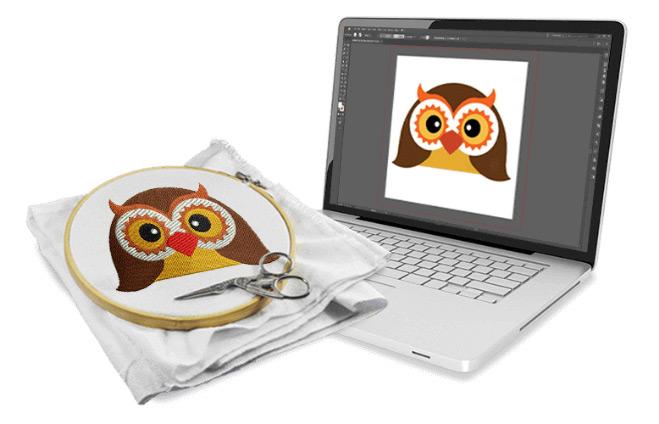
You have a photo, a logo, or a fun graphic on your phone. Your Janome machine is ready to go. But that machine speaks JEF, not JPG. So you need a bridge between the two. The good news is that going from JPG to JEF Online is way easier than most people make it sound. You do not need to buy expensive software, watch hours of tutorials, or become a digitizing expert overnight.
I remember my first attempt. I thought I had to learn complicated stitch editing software just to get a simple heart shape onto a t-shirt. I was wrong. There are online tools that do the heavy lifting for you. Yes, they have limits. Yes, they are not perfect for every design. But for the vast majority of casual users and even some small business owners, an online converter gets the job done fast and cheap.
Let me show you exactly how to do it, what tools actually work, and when you should avoid going online altogether.
Why JPG to JEF Is Tricky but Not Impossible
Here is the honest truth. Converting a JPG to JEF is not like converting a Word doc to a PDF. You cannot just rename the file and call it a day. JPG files store pixels. JEF files store stitch commands. Your Janome machine needs to know where to put every single needle penetration, when to raise the presser foot, when to trim thread, and when to change colors. A JPG has none of that information.
So any online converter you use has to interpret your image and make decisions about stitch type, density, underlay, and color breaks. That is called digitizing. And digitizing well takes skill. But digitizing adequately for simple designs? That online tools can handle.
Think of it like this. A professional chef can make an amazing meal from scratch. But you can still make a perfectly fine sandwich at home without culinary school. Online JPG to JEF converters are your sandwich. They will get you fed quickly, cheaply, and with minimal fuss. Just do not expect a five course meal.
Free Online Tools That Actually Work
I tested a bunch of so called converters so you do not have to waste your time. Most of them do not even support JEF. They convert JPG to other image formats like PNG or JIF and call it a day. That is useless for embroidery.
Here are the ones that actually deliver usable JEF files.
TrueSizer by Wilcom
This is the closest thing to a magic button. TrueSizer is a free desktop application from Wilcom, the same company that makes professional digitizing software. It runs on Windows. You drag your JPG into the window, and the auto-digitizing feature creates a JEF file in seconds. It is not technically an online tool because you have to download the software, but it is free, it takes two minutes to install, and it works offline. For most home users, this is your best bet.
The quality is respectable for simple designs. Bold logos, text outlines, and basic shapes come out clean. Detailed photos or designs with lots of small elements get messy, but you can adjust settings to simplify the output. TrueSizer also lets you set your hoop size and choose JEF as the export format.
SewArt Online
SewArt normally runs as desktop software for about sixty dollars, but they offer a limited online version. You upload your JPG, and the server does the digitizing. You download the JEF file. The free tier gives you a few conversions before asking for payment. The auto-digitizing is better than most free tools because it actually understands embroidery settings like density and pull compensation.
The catch is speed. Because the processing happens on their servers, you might wait a few minutes for complex designs. For simple work, it is usually under thirty seconds. Privacy is another consideration. Do not upload customer logos or sensitive artwork to a free online tool unless you read their data policy first.
MyEditor Embroidery Converter
MyEditor is a pure online tool. No download, no installation, no account required. Upload your JPG, select JEF as the output, and click convert. The whole process takes about fifteen seconds. I tested it with a simple black and white logo, and the resulting JEF file stitched out reasonably well on a Janome 230DC. The letters were slightly jagged, but the overall shape was correct.
Where MyEditor falls apart is color complexity. If your JPG has more than three colors or any gradients, the output becomes a mess. Stick to high contrast, solid color images. Think coloring book pages, not photographs.
Step by Step: Your First Online Conversion
Let me walk you through a real example using TrueSizer because it is free, reliable, and the results are consistent.
Download TrueSizer from the Wilcom website. Install it. This takes about two minutes. Open TrueSizer and click the auto-digitize button. A window pops up asking you to select an image. Choose your JPG file. The software analyzes the image and asks you a few simple questions. Hoop size, number of colors, stitch density. Set the hoop to match your Janome machine. For most home machines, that is 100x100 or 130x180 millimeters. Set stitch density to medium or 0.45 millimeters. Too dense and your machine will jam. Too loose and the design looks sparse. Click OK. Wait about ten seconds. The software shows you a preview of the stitch paths. If it looks reasonable, go to File > Export > JEF. Save the file to your computer. Copy it to a FAT32 formatted USB drive. Plug it into your Janome machine. Run a test stitch on scrap fabric.
That whole process takes less than five minutes for a simple design.
What Online Converters Cannot Do
I want to be upfront about the limits so you do not get frustrated.
Online converters struggle with small text. Anything smaller than a quarter inch tall will likely stitch out as a blob. Professional digitizing uses special techniques like satin columns and adjusted pull compensation to keep tiny letters readable. Free online tools do not do that.
They also struggle with gradients and photographs. A JPG of your dog will not become a beautiful embroidery portrait with a single click. You need manual digitizing for that, which online tools simply do not offer.
Fabric awareness is another weak point. A good digitizer changes settings based on whether you are stitching onto a stretchy t-shirt, a thick cap, or a slippery jacket. Online converters assume a standard woven cotton. If your fabric behaves differently, the design may pucker or distort.
Color separation is often inaccurate. Your JPG might have red and blue, but the converter merges them into one color or splits them incorrectly. You can sometimes fix this by editing your JPG before uploading. Increase contrast, flatten to just two or three solid colors, and remove any background noise.
When to Upgrade from Online to Professional
Online converters are fantastic for certain situations. You are making a one off gift and do not want to learn software. You run a very small Etsy shop and need a quick file for a simple design. You are testing a design idea before committing to professional digitizing. You stitch for fun and do not care about perfection.
But if any of these apply to you, consider moving beyond online tools. You run a commercial embroidery business where every file must stitch cleanly on the first run. Your designs have small text, complex gradients, or detailed artwork. You stitch onto tricky fabrics like performance wear, leather, or thick fleece. You need consistent color separation and thread trims.
For those situations, either buy professional software like Wilcom Hatch or outsource to a digitizing service like Absolute Digitizing or Digitizing Buddy. You will pay more upfront but save money in wasted thread and ruined garments.
Pro Tips for Better Online Conversions
Even with free tools, you can improve your results dramatically by prepping your JPG first.
Open your JPG in any photo editor, even MS Paint. Crop out all extra background. You want only the design itself. Convert the image to black and white or reduce it to three solid colors max. Increase the contrast to the maximum. Soft edges confuse digitizing software. Hard edges give clean stitch paths. Enlarge the image to match your desired stitch out size. If you want a four inch design, scale the JPG to about four inches at 300 DPI. Remove any gradients, shadows, or transparent effects. They will not translate to stitches.
Save as a PNG instead of JPG. PNG preserves sharp edges better. Name the file something simple like design.png. No spaces, no special characters.
Then upload that cleaned up image to your online converter. The difference between a raw photo and a prepped graphic is night and day.
Conclusion
Going from JPG to JEF online is absolutely the easy way to create embroidery files, as long as you understand the limits. Free tools like TrueSizer and SewArt Online work wonderfully for simple logos, bold graphics, and personal projects. They take minutes instead of hours and cost nothing or very little. Just prep your image first, stick to high contrast and solid colors, and always test on scrap fabric before stitching your final product.
When your designs get complex or your business grows, invest in professional software or digitizing services. But for quick, easy, and casual use, online converters are your new best friend.
Now go upload that JPG and turn it into stitches. Your Janome machine does not care if you are a pro or a beginner. It just wants a proper JEF file. Give it one