


Radon is a naturally occurring radioactive gas that can enter homes through cracks in foundations, gaps around pipes, basement floors, and other openings. Because radon has no smell, colour, or taste, homeowners cannot detect it without proper testing. Long-term exposure to elevated radon levels can increase the risk of lung cancer, making radon testing and reduction important parts of maintaining a healthy home.
Many homeowners search for a DIY radon removal service because they want to understand whether they can reduce radon levels themselves or save money on professional assistance. Although some preventive measures can be completed independently, effective radon reduction often requires specialised equipment, proper installation, and follow-up testing.
Understanding how radon enters a property, which solutions are available, and when professional help is necessary can help homeowners make informed decisions about their indoor air quality.
What Is a DIY Radon Removal Service?
A DIY radon removal service generally refers to methods homeowners use to identify, manage, or reduce radon levels without hiring a professional contractor for every step. These methods may include testing indoor radon concentrations, sealing certain openings, improving ventilation where appropriate, and monitoring changes over time.
However, radon removal is different from ordinary home maintenance. Simply opening windows or sealing visible cracks does not reliably eliminate the gas. Radon can continue entering through hidden pathways beneath the foundation.
A successful radon reduction strategy begins with accurate testing and uses a system suited to the property's construction, soil conditions, and radon entry points.
Why Is Radon Testing Important Before Removal?
Before attempting any radon reduction work, homeowners should determine the radon concentration inside their property. Testing provides a baseline and helps establish whether further action is needed.
Choosing a Suitable Radon Test
Homeowners can use recognised short-term or long-term radon test kits. Short-term tests can provide an initial indication, while long-term tests generally offer a better picture of average radon exposure because levels fluctuate with weather, ventilation, and seasonal conditions.
For reliable results, follow the manufacturer's instructions carefully and place the test in an appropriate regularly occupied area, such as a basement or ground-floor room. Avoid locations where unusual airflow, excessive humidity, or other conditions could affect the result.
In Canada, the recommended guideline for taking corrective action is an average annual radon concentration above 200 becquerels per cubic metre (Bq/m³). Local recommendations and building requirements may differ.
Understanding the Results
A single test result should be interpreted according to the test duration and the conditions during testing. If results are elevated, consider confirming them with additional testing or arranging a professional assessment.
Testing is essential because homeowners cannot determine radon levels through smell, appearance, or general observations of the building.
Practical Ways to Reduce Radon at Home
Some DIY measures can help address potential radon entry points, but they should not be treated as a guaranteed solution.
1. Seal Visible Cracks and Openings
Inspect accessible areas of the foundation, basement floor, and walls for visible cracks or gaps around plumbing and utility connections. Suitable sealants can help close these openings and may reduce some pathways through which soil gases enter.
However, sealing alone is rarely sufficient to control elevated radon levels. Gas can enter through concealed openings and other parts of the foundation, even when visible cracks have been repaired.
2. Improve Indoor Ventilation Carefully
Ventilation can influence indoor radon concentrations, but the results depend on the building's design and airflow patterns. Opening windows may temporarily reduce concentrations in some circumstances, but it does not provide dependable long-term protection.
In some homes, exhaust fans and pressure differences can actually draw more soil gas indoors. For this reason, avoid relying on ordinary fans or open windows as the primary radon reduction method.
3. Consider a Proper Radon Mitigation System
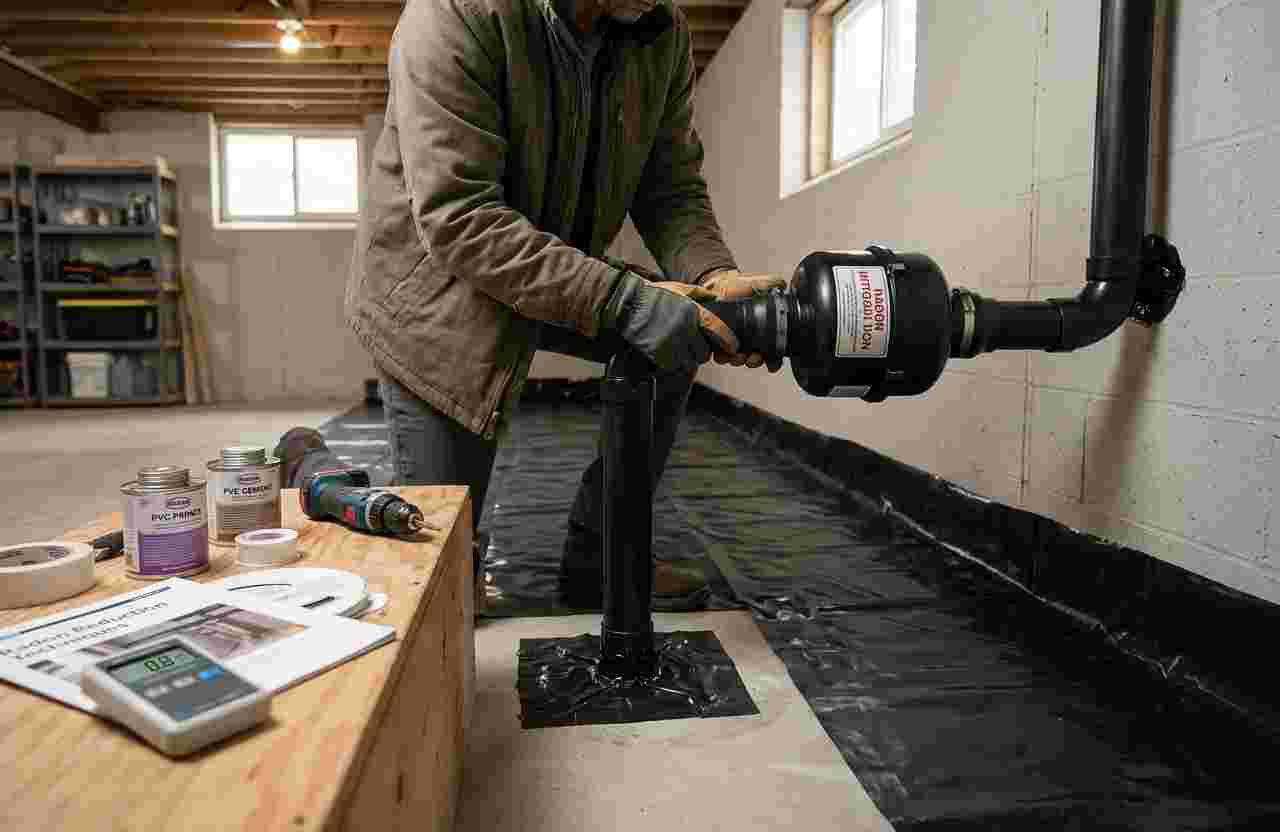
For homes with elevated radon levels, a common solution is an active soil depressurisation system. This typically uses a pipe, a continuously operating fan, and an appropriate discharge point to draw radon-containing soil gas from beneath the foundation and release it safely outdoors.
Although homeowners may research the components of such a system, installation requires an understanding of pressure dynamics, foundation construction, electrical safety, and local building requirements. An incorrectly installed system may perform poorly or create other problems.
Before attempting installation, consult a qualified radon mitigation professional to determine the appropriate system for the property.
4. Retest After Making Changes
Testing should continue after any radon reduction work. Without a follow-up test, homeowners cannot know whether their efforts have actually reduced indoor concentrations.
Use a recognised testing method and follow its instructions. If radon levels remain elevated, seek professional assessment rather than repeatedly trying unverified household remedies.
DIY Radon Removal Versus Professional Radon Mitigation
Choosing between DIY measures and professional services depends on the severity of the radon problem, the home's structure, and the complexity of the required solution.
| DIY approach | Professional approach |
|---|---|
| Suitable for initial testing and basic inspections | Suitable for diagnosing complex radon entry problems |
| May include sealing accessible cracks | Can include engineered mitigation systems |
| Usually involves lower initial costs | Requires payment for assessment and installation |
| Results depend on the measures used | Includes system design and performance verification |
| May not resolve high radon concentrations | Better suited to persistent or elevated readings |
DIY maintenance can be useful as part of a broader plan, but it should not delay effective mitigation when testing shows a significant radon problem.
Common DIY Radon Removal Mistakes to Avoid
Homeowners can waste time and money when they misunderstand how radon behaves. Avoid these common mistakes:
-
Ignoring test results: Elevated readings should prompt appropriate corrective action.
-
Relying only on sealing: Visible cracks are not necessarily the only entry points.
-
Using unverified products: Air purifiers and ordinary household fans should not be assumed to remove radon effectively.
-
Ignoring local regulations: Building codes and electrical requirements may apply to mitigation systems.
-
Skipping follow-up testing: A completed repair does not automatically prove that radon concentrations have fallen.
-
Installing equipment without sufficient knowledge: Poorly designed systems can be ineffective and may create safety concerns.
A careful approach prioritises measured results rather than assumptions about what should work.
When Should You Hire a Radon Professional?
Professional assistance is particularly important when testing shows elevated radon concentrations, when previous DIY efforts have failed, or when a property requires a permanent mitigation system.
A qualified contractor can assess the foundation, identify likely entry routes, recommend an appropriate reduction strategy, and verify system performance after installation. Ask about relevant certification, experience, written estimates, warranties, and post-installation testing.
Homeowners should also consider professional advice when renovating basements, finishing below-ground rooms, or purchasing a property in an area where radon exposure is a recognised concern.
The goal is not simply to install equipment but to achieve a measurable and sustainable reduction in indoor radon levels.
How Can Homeowners Maintain Low Radon Levels?
Radon management should continue after the initial problem has been addressed. Regular testing helps identify changes caused by renovations, foundation movement, altered ventilation, or equipment failure.
If an active mitigation system is installed, check that its operating indicator shows normal operation and arrange maintenance when needed. Retest according to professional recommendations and applicable public health guidance.
Keeping records of test results, system maintenance, and completed repairs can also help homeowners evaluate long-term performance and make informed decisions about future improvements.
Conclusion
A DIY radon removal service can help homeowners understand radon testing, inspect accessible areas, and take basic preventive measures. However, these steps cannot guarantee safe indoor radon levels, particularly when concentrations are elevated.
The most effective approach combines accurate testing, suitable mitigation measures, and follow-up verification. While sealing cracks and improving building maintenance may contribute to a broader strategy, a properly designed radon mitigation system is often necessary for persistent problems.
By understanding the limitations of DIY solutions and seeking qualified assistance when needed, homeowners can make more informed decisions about protecting their indoor environment.
About Our Brand Ottawa Radon
Ottawa Radon is dedicated to helping homeowners understand radon risks and explore practical solutions for improving indoor air quality. Through our website, homeowners can learn more about radon testing, mitigation options, and the importance of reducing long-term exposure to elevated radon levels. Whether you are researching a DIY radon removal service or considering professional assistance, our goal is to help you make informed decisions about your home's safety and comfort.

 English
 Arabic
 French
 Spanish
 Portuguese
 Turkish
 Dutch
 Italiano
 Russian
 Romaian
 Portuguese (Brazil)
 Greek